Simply download the CabvisionDriver app from the Apple or GooglePlay Store. MoneyBag is a feature within the main Application and not an independent application in itself.
Yes, you need to be a current customer of Cabvision or CabPay to use MoneyBag. You will need to download the CabvisionDriver App.
MoneyBag is a free to use Application.
MoneyBag is an expense tracker by Cabvision that allows you to keep detailed records of your income and expenses from a single, secure location.
Just like fitness trackers can help you to lose weight by recording your food intake and exercise levels, MoneyBag can assist your financial health by helping you to keep track of your income and expenses in real-time.
By recording your income and expenses on a day-to-day basis, you not only have a real-time management tool for your business but also reduce any future effort required for your tax returns, as you can store all income and outgoings in one secure location.
By having all the information stored in one convenient place, MoneyBag should save you time and money!
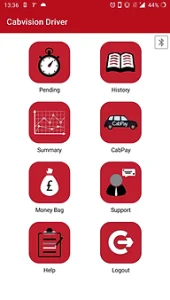
Once you have downloaded the CabvisionDriver app and logged in using your account number and password, from the main menu, press the "Money Bag" icon.
You will then be presented with Money Bag menu screen:
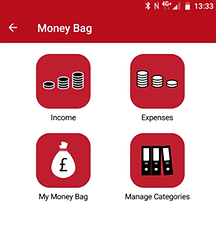
Default "Income" and "Expense" categories have already been setup for your convenience which should cover the working categories of most drivers. However, you are able to manage the categories and configure them to your individual requirements.
If there isn't an existing category for an item that you require or there are categories that you don't require, you have the ability to add or hide fields.
Example 1 - Adding/Storing a Transaction
- Every transaction has a type, either "Income" or "expense".
- From the main "Money Bag" screen, press the "Expenses" icon.
- At the "Add Expense" screen, choose a category, eg: "Energy / Fuel", then choose a subcategory, eg: "Electric".
- Add an amount, and optimally a note and receipt.
- Press "Save"
Example 2 - Viewing stored Transactions
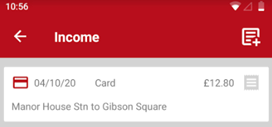
You can view your stored Income and Expenses by clicking the magnifying glass in the top right corner of the "Add Expense" or "Add Income" screen.
If you add a receipt, the grey icon on the right will change to a coloured image so that you can easily identify which transactions have receipts stored against them.
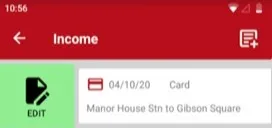
Example 3.- Editing a stored Transaction
Once you have saved an entry, if you later discover a mistake, you can swipe right on the item and press the edit icon to return to the item details where you can update the entry. The App will automatically save the updated information
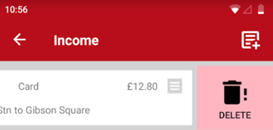
Example 4 - Deleting a stored Transaction
If you would like to delete a transaction, you can swipe left and press the delete icon. The transaction will be permanently removed.
Example 5 - Managing Categories
This "Manage Categories" screen allows you to tailor the App to your own needs.
In the "Manage Categories" screen, the default categories cannot be edited, however they can be deleted or hidden.
To hide a category, use the order/hide button, and then check the box for category you do not want to see in your list.
After pressing save, the category will be hidden. You can restore hidden categories at a later date if you wish.
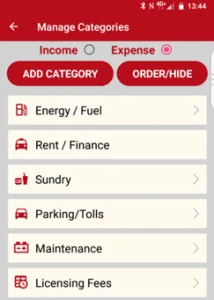
Example 6 - Changing the order of Categories
To change the order of categories, press the "order/hide" button and then hold your finger down on the on the category you would like to move for 1 second, the category then becomes floating and can be "dropped" into a new location by moving your finger to the new location and then letting go. Press save to store the new category positions.
Example 7 - My Money Bag
The "My Money Bag" screen displays an overview of Income and Expense transactions so that you can easily track and review your finances at a glance.
Set the date range to your requirements and press a chart icon on the right to display the summary of income or expense transactions during that period.
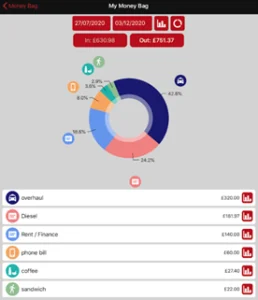
There are two two types of chart available, a Bar Chart and a Donut Chart. Note that on devices with smaller screens only the Bar Chart view is available.
Overview
Income - there are default headings within the Income section. Tap the category and add income earned, and make a brief note of how it was earned. i.e. Manor House to Gibson Square.
Example: £10.00 cash.
Expenses - there are default headings within the Expenses section. Tap the category and add the cost and type of expenditure.
Example: £20.00 Fuel
Donut - the Donut provides a quick overview of your Income vs Expenses, including the categories. This allows you to keep track of your finances in real-time to ensure effective money management.
If you've added it to your homepage, the Donut, for example, will show you how much you've spent on food and beverages. This may be an area that you can reduce expenditure in an effort to retain more of your earnings.
Manage Categories - this enables you to add or hide a default setting.
For example: You may wish to add a ‘Hotel’ field if you live outside of London but work in the city. You can click on the 'add' button and label the field to meet your exact needs.
Users of Cabvision or CabPay credit card systems can download their income statements from the Cabvision Driver Portal.
You cannot currently download directly from the MoneyBag Application.